My Revit-to-Lumion Workflow for Architectural Visualization
Building Information Modeling (BIM) fundamentally changed architecture. We stopped drawing lines representing walls, and started placing data-rich assemblies that act like walls. But while Revit is unparalleled for technical documentation and clash detection, its native rendering engine is rigid and slow.
Clients don't buy floor plans. They buy the feeling of walking into a space. To bridge the gap between technical precision and emotional resonance, I rely on a strict Revit-to-Lumion pipeline.
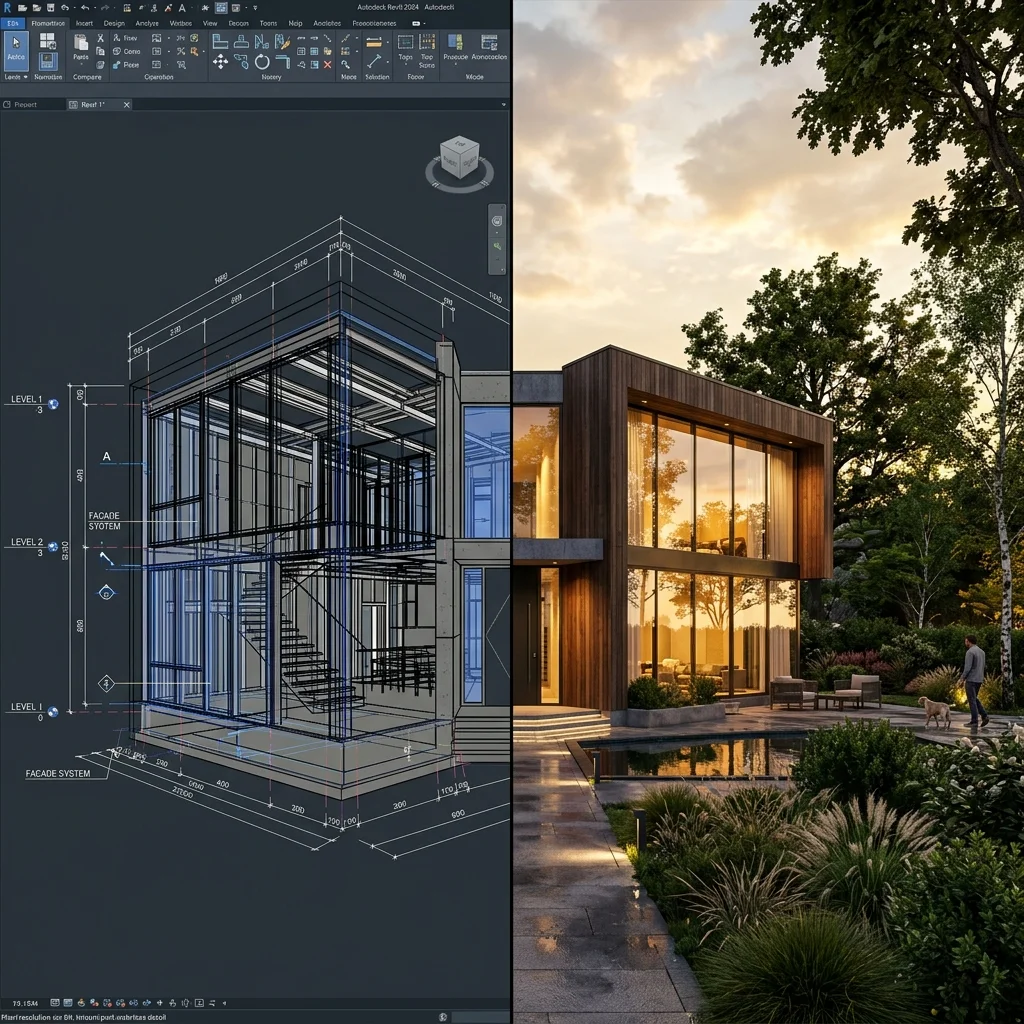
The Problem: Data Overload
A mature Revit model is heavy. It contains structural rebar, HVAC ductwork, electrical panel schedules, and wall core layers. When you try to render this directly, you waste enormous computational resources calculating light bounces off of objects hidden inside ceiling plenums.
The secret to a fast, photorealistic visualization workflow isn't just a better GPU—it's model hygiene.
Step 1: The Export View Template
The most critical step happens before you ever open Lumion. In Revit, I maintain a dedicated 3D-Export-Lumion view template.
This template aggressively filters the model:
- Turns off all MEP/Structural elements that aren't exposed.
- Hides generic models and placeholder families (like that low-poly couch you downloaded from BIMobject).
- Applies strict material overrides. In Lumion, materials are mapped by surface name. If your Revit model uses "Default Wall" for both exterior stucco and interior drywall, Lumion will treat them as the same surface. The export template ensures every distinct finish has a distinct Revit material.
Step 2: The LiveSync Bridge
Historically, updating a rendering meant exporting an .fbx file, importing it into your render engine, and hoping the texture mappings didn't break.
Today, the Lumion LiveSync plugin allows a direct memory link between Revit and Lumion. As I move a mullion in Revit, it shifts in Lumion in real-time. This changes visualization from a "post-production" step into a "design-assist" tool. You can actually test how morning sunlight hits a specific corner of a room while you're still modeling it.
Step 3: Material Replacement and Entourage
Once the geometry is synced, the real work begins.
Revit materials are replaced with Lumion's physically based rendering (PBR) materials. I focus heavily on roughness and displacement maps. A concrete wall shouldn't just look grey; it should catch the light on its imperfections.
Next is entourage. A rendering without context feels sterile. I use Lumion's nature library to build out the site context, placing trees not just for aesthetics, but to cast specific, dappled shadows across the building's facade.
Why a Good Rendering Cannot Rescue a Weak Design
It is tempting to hide bad architecture behind a beautiful sunset sky, lens flares, and high-resolution textures. But a rendering is just a communication tool.
If the circulation of a building is broken, or the proportions of a facade are unbalanced, a photorealistic render will only highlight those flaws in higher fidelity.
The goal of this workflow isn't to create deceptive marketing material; it's to create an accurate, evocative translation of the technical Revit model into a space a client can understand and approve.